I received an Oculus Rift virtual reality headset today, and the set-up was quite easy. That’s a good omen as the age of VR kicks off with the launch today of the Oculus Rift on the Windows PC.
It helped that I had an Oculus-ready PC, or a PC with a high-end 3D graphics chip from Nvidia. That meant that I could set the Rift up to work with my system out of the box. VR is a very demanding application when it comes to graphics, and so you have to have a computer that meets the minimum hardware specifications.
Once you have that, the instructions are pretty easy. You have to make sure you have a lot of space to move around while using your Rift, moving away anything that you might bump into or trip over. You then install the Oculus setup software on your PC.
You have to locate the USB 3.0 ports (which are often blue) on the computer. Then you plug in the USB 3.0 cable from your headset into a port on the PC. Then you plug the headset’s HDMI-compatible cable into the HDMI port on your computer’s 3D graphics card. Then you take the USB 3.0 cable for the Oculus sensor (which looks like a big microphone) and then plug it in. On the screen of your monitor, you’ll see a green check mark appear each time you connect something successfully.

Above: The Oculus Rift VR headset comes with all of these items.
Then you set up the Oculus Remote by removing the plastic battery tab and pressing the button. Next, you connect the Xbox controller. You add AA batteries to it, set up the wireless sensor and plug it into a USB port, and then pair the Xbox controller with the wireless sensor. When that happens, the on-screen guide shows that you’ve succeeded.
You have to go to the Oculus Store web site and create your Oculus account, using an email and password. Once you’ve done that, you can start making purchases.
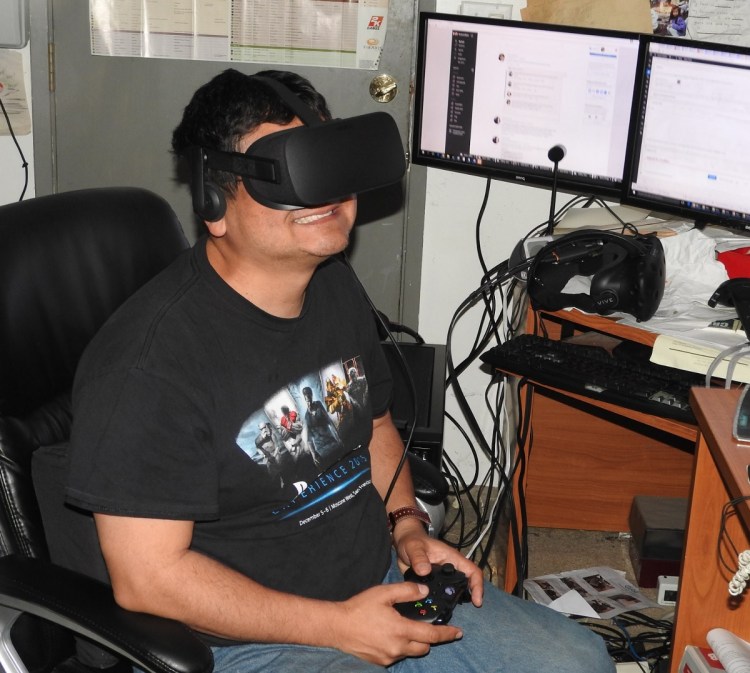
Next, I had to set up the headset. The Oculus folks included a little cloth so you can make sure that you clean the lenses.
I waved it in front of the sensor to make sure the sensor was working. Again, the green check market appeared on the screen. Then I adjusted the straps so I could fit it over my big head and my glasses. I pulled the three straps tight to get a comfy fit. I pulled down the ear headphones over my ears. The sensor then detected whether the headset was positioned correctly on my head. It wasn’t at first, so I took it off and put it on again. Then it worked fine. I adjusted the slider at the bottom of the headset to make sure my eyes could focus properly.
This controls the IPD, or interpupillary distance, the distance between your pupils. It has quite a range, and I found the right setting by adjusting it through trial and error. I viewed a vertical green line with the headset, and I stopped adjusting once I could focus on that green line. After that, I was pretty much ready. A 3D white landscape came into view, and then I was introduced to the world of VR using the Oculus Dreamdeck, a set of little VR vignettes that have been created over the past couple of years to make you feel like you’re in another place. Among them is the memorable demo where a giant T-Rex comes running up to you and roars in your face.
I’d have to add that the process of installing games isn’t really polished. You have to start downloading a title from the store. But you have to exit VR and go to your computer in order to complete the install and start the game. That’s not exactly easy to do, considering you have to find the icon for installing the game.
VentureBeat's mission is to be a digital town square for technical decision-makers to gain knowledge about transformative enterprise technology and transact. Learn More
