This post has not been edited by the GamesBeat staff. Opinions by GamesBeat community writers do not necessarily reflect those of the staff.
 Many of my friends (including myself) have invested a lot of money in their gaming set-ups. All of them have their preferred console hooked up to an HDTV and a 5.1 surround sound system but I was surprised to see that none of them calibrated any of the components. I don’t know how they can endure playing games and watching movies at factory or showroom settings. If you’re going to spend that kind of money you should make sure it’s working at its fullest potential. And with the recent release of Halo Reach I thought many could benefit from some of the minor tweaks in this very simple set-up guide that will improve the picture on your television and the sound from your surround sound system.
Everything here can be done in less than an hour and without any special equipment. All you need is:
- A video game console
- The component you want to calibrate; i.e., HDTV or surround sound system
- Media: a game, a movie, some music
Let’s start with something I know everyone has — the TV. I’ll mostly be referring to HDTV settings but old tube televisions can be calibrated in the same manor.
First things first, make sure the lighting in the room is set to how it normal is when you play games or watch movies. For example, if you do most of your gaming in the dark, cover up those windows and turn off the lights.
Next, navigate to your TV’s picture menu and turn off all the built-in special features that supposedly enhance the picture. These will be labeled something like “flesh tone,” “black level,” and “noise reduction.” Your TV may have others, so make sure to turn them all off. If your TV has a color temperature setting of “warm” or “cool” change it to “normal”. Having all of these turned on will actually ruin the natural look we are trying to achieve.
Now notice what “picture mode” is currently selected. These will be called “vivid,” “sports,” “dynamic,” “movie,” “cinema,” “normal,” “standard” or “pro”. Most people like to put it on “vivid” or “sports” because the picture is bright and the colors are at the prettiest, but this is the mode you want to avoid most. The grass on the football field might look greener on this mode but it’s far from looking realistic. To quickly configure your TV for the most accurate and realistic picture, choose “movie”, “cinema”, “pro” or whatever it may be labeled on your TV. This setting will be the closest to a proper and fully configured television. If you were using “vivid” before and just now switched to “movie” the picture will seem incredibly dark. Just give it some time and you will adjust.
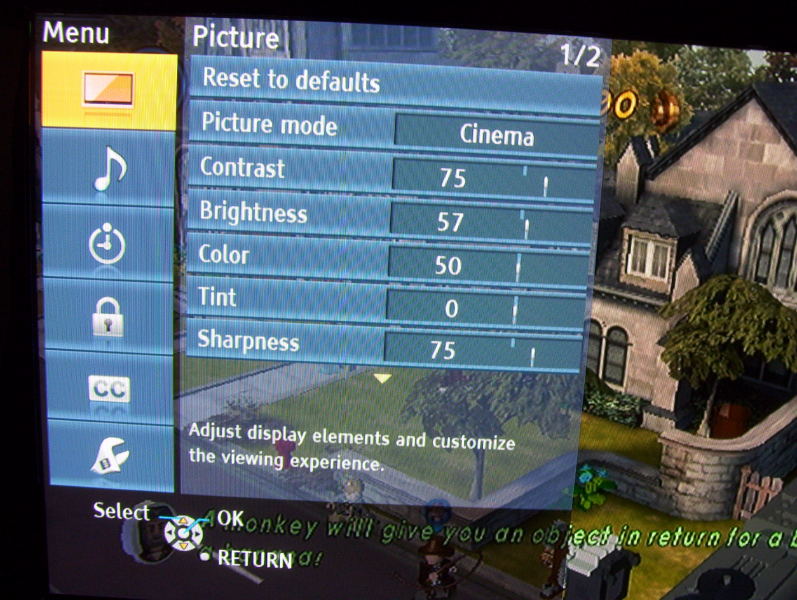
For those of you that would like an slightly better, more natural-looking picture continue reading. In this next part I will explain how to tweak the individual picture settings. First, let’s go over what they are and what each mean.
- Contrast or Picture: this is the white level or the brightness of the image. Most people think “Brightness” would adjust the brightness, but it doesn’t.
- Brightness: this is the black level. It’s used to change the shade of the color black. If set too high, blacks will appear gray. What you want here is to have the blacks look black but retain the detail in dark scenes.
- Color or Saturation: if this setting is too high it will cause people to look like they have sunburns. Also, if this is set too high the color red will bleed into adjacent colors.
- Tint or Hue: if your TV has this setting, it is used to make fine adjustments after the color has been tweaked.
- Sharpness: this can be set all the way down to zero if you are displaying content from a high definition source; i.e, Xbox 360. Messing with this setting would only be noticeable when watching content from a standard definition source. In this case, raising it will improve the edges of objects in the picture. Beware, setting it high does not mean you’ll have a sharper image.
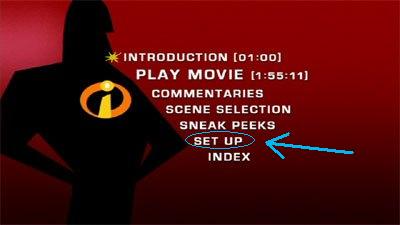
To adjust the individual values of these settings you will need a movie from this list. These DVDs have THX test patterns to help you accurately adjust the picture settings. If you have a DVD on that list just go to the Set Up page from the main menu of the DVD and follow the step-by-step directions. I used The Incredibles. Easy-peasy-lemon-squeezy.
If you don’t have a DVD on that list, it will take a little longer. You will need to choose a game or movie that has a scene with a lot of white (such as snow), another with a very dark scene, and another that is colorful. Movies would work better, but for games I would recommend Lost Planet for the white, Gears of War for the dark, and a Mario game for something colorful.

Once you have a static image from one of those movies or games, start messing around with the picture settings. Remember, you want the whites to look white and the blacks to look black while still being able to see detail within. Also, pay attention to skin tones. Make it look natural and not glowing orange, like the cast of the Jersey Shore.
Congratulations! You should now have a much more natural and realistic looking picture. People and objects should look like they have weight to them; the picture should have depth instead of looking two dimensional. If you want to get hardcore about your picture quality there are several DVDs on the market that will go into much greater detail and have many more test patterns to finely tune the picture.
Now we get to my favorite part, and what I believe to be more important than picture quality — the sound.
Before all else, the most important thing about setting up speakers is their placement. Far too often, I see people place their speakers in the oddest of places — nowhere near where they should be. The center speaker is where most dialogue and on-screen sound comes from so it needs to be either below or above the TV. Seems obvious, right? You’d be surprised.
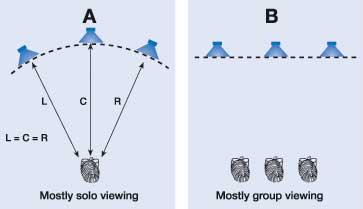
The front left and right speakers need to be on their respective sides of the TV. Not too far away from the TV though; three feet max will do. Like the center speaker, these two speakers also project on-screen action, so if they’re too far off to the sides it won’t sound right.
There’s two different directions the three front speakers can point; all facing towards you (if you are the only one using the gaming setup) or all facing straight forward (if there are multiple people enjoying the game). Also, the front left and right speakers should be at ear-level. The center speaker, too, if possible.
The left and right surround channel speakers can get a bit tricking. The ideal place to have these is a little above ear-level and off to the left and right of your seated position. I don’t have speaker stands, so what I do is put them up high on my walls pointing down to where I usually sit. I’ve seen some people put these speakers behind them, but what they don’t realize is that the sound teams on movies and games design the ambient sounds to come from the left and right of the listener in a 5.1 setup. The positions behind the listener is reserved for a 7.1 surround sound setup. If you want to hear your game the way it 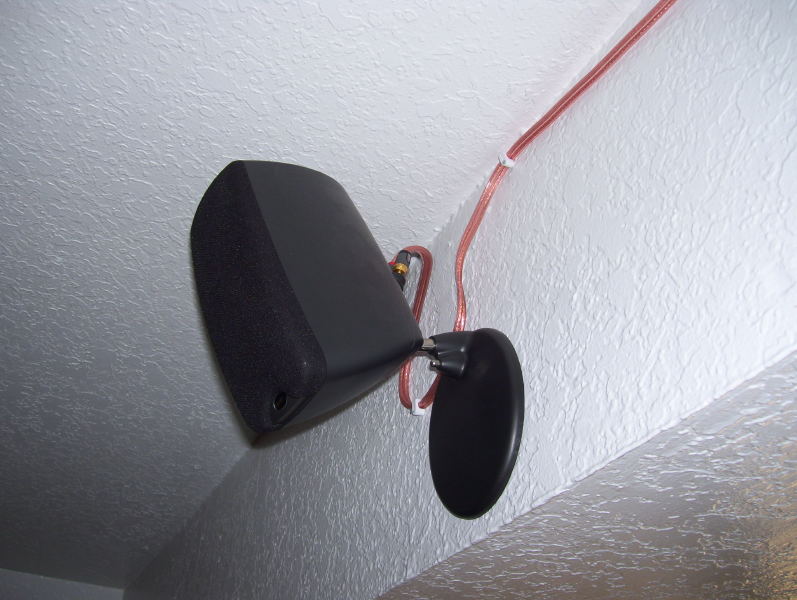 was meant to be heard, move those speakers to the sides.
Last, but certainly not least, is the sub woofer. Subs are omni-directional, so you can put it anywhere you want, but if you want the get the most out of it, there’s two approaches. If you have a small home theater-in-a-box sub, it would be best to place it in a corner. This will amplify the low frequencies and give it a much fuller sound.
If you have a larger powered sub woofer, there’s a neat trick to choose the best position in the room. First, put on some music that has a significant amount of bass. Now, you’re going to want to put the sub where you usually sit. If you sit on a couch push it to the side and place the sub on the floor in that spot. Next, move around the room to determine where the sub sounds the best. Did you find the sweet spot? Put your sub right there. 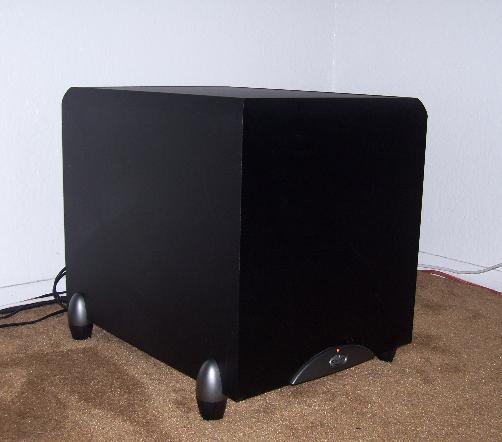
Configuring the receiver for delays, degrees, and distance to listener can get very complicated, so I’m going to leave you with this simple yet effective tip: put it on Dolby Digital and leave it alone. Like TVs, receivers have factory preset modes. They can be labeled “game,” “sports,” “drama,” “action,” “music,” etc. None of these get the job done as good as the default Dolby Digital setting. Plus, any receiver made in the last decade can auto-detect the type of signal being received and adjust accordingly.
I know this from experience. Up until a few days ago I had mine set on “game” mode. It sounded loud and the bass trembled, but when I did the THX sound test on the Incredibles DVD I noticed that the left and right surround speakers weren’t being used. I have since changed my receiver to Dolby Digital and my games are much more immersive. I’m switching out games constantly just so I can hear how they sound now.
Well, that’s all folks. Halo Reach (and everything else) will now look and sound a whole lot better. I really hope I was able to help and teach a few of you something. If there are any questions that you would like me to address that are specific to your gaming setup just ask in the comments and I will gladly answer them. Or better yet, if you all want to post links in the comments to pictures of your setup I would love to see where everyone does their gaming.
